HomeLab Networking
Online Resources
- Proxmox Software-Defined Network
- OPNsense documentation
- Beginner’s Guide to Set up a Full Network using OPNsense
VNet Overview
| Name | Alias | Subnet | Gateway | SNAT | DHCP Range |
|---|---|---|---|---|---|
| AttDMZ | Attacker DMZ | 10.1.0.0/24 | 10.1.0.1 | FALSE | 10.1.0.100 - 10.1.0.254 |
| AttExt | Attacker External | 10.1.1.0/24 | 10.1.1.1 | FALSE | 10.1.1.100 - 10.1.1.254 |
| AttInt | Attacker Internal | 10.1.2.0/24 | 10.1.2.1 | FALSE | 10.1.2.100 - 10.1.2.254 |
| TarDMZ | Target DMZ | 10.2.0.0/24 | 10.2.0.1 | FALSE | 10.2.0.100 - 10.2.0.254 |
| TarAdm | Target Admin | 10.2.1.0/24 | 10.2.1.1 | FALSE | 10.2.1.100 - 10.2.1.254 |
| TarIT | Target IT | 10.2.2.0/24 | 10.2.2.1 | FALSE | 10.2.2.100 - 10.2.2.254 |
| TarHR | Target HR | 10.2.3.0/24 | 10.2.3.1 | FALSE | 10.2.3.100 - 10.2.3.254 |
IMPORTANT
Do NOT specify a Gateway in Proxmox’s Subnet UI, as this will cause an IP conflict with the OPNsense Firewall we’ll configure in the next section.
IMPORTANT
Do NOT specify any DHCP Ranges either, we’ll configure those in OPNsense as well.
Configuring the OPNsense Firewalls
Hardware
Install OPNsense Permanently
- Login with:
installer:opnsense - Then go through the installation wizard
Setup GUI Access from WAN Interface
WARNING
This is especially not recommended for PROD! But since this Lab is isolated, and I’m my own attacker, I am configuring GUI Access on the WAN interface for convenience’s sake.
- Login using
root:[THE_PASSWORD_YOU_CHOSE_DURING_SETUP] - Open the Shell
- Temporarily disable the Firewall:
pfctl -d(you might need to do this a couple of times until the final reboot if you lose access to the WebUI) - Go to
Interfaces→WAN, uncheckBlock private networksand clickSaveat the bottom - All the following rule to the WAN Interface:

- Go to
Firewall→Settings→Advancedand tickDisable reply-to (Disable reply-to on WAN rules) - Reboot (This is important!)
Basic Config
- Login using
root:[THE_PASSWORD_YOU_CHOSE_DURING_SETUP] - Set the WAN interface to
vmbr0interface and leave the rest as optional interfaces - Add the other interfaces (to the VNets) and give them a representative name

- Enable all the interfaces in the Web GUI
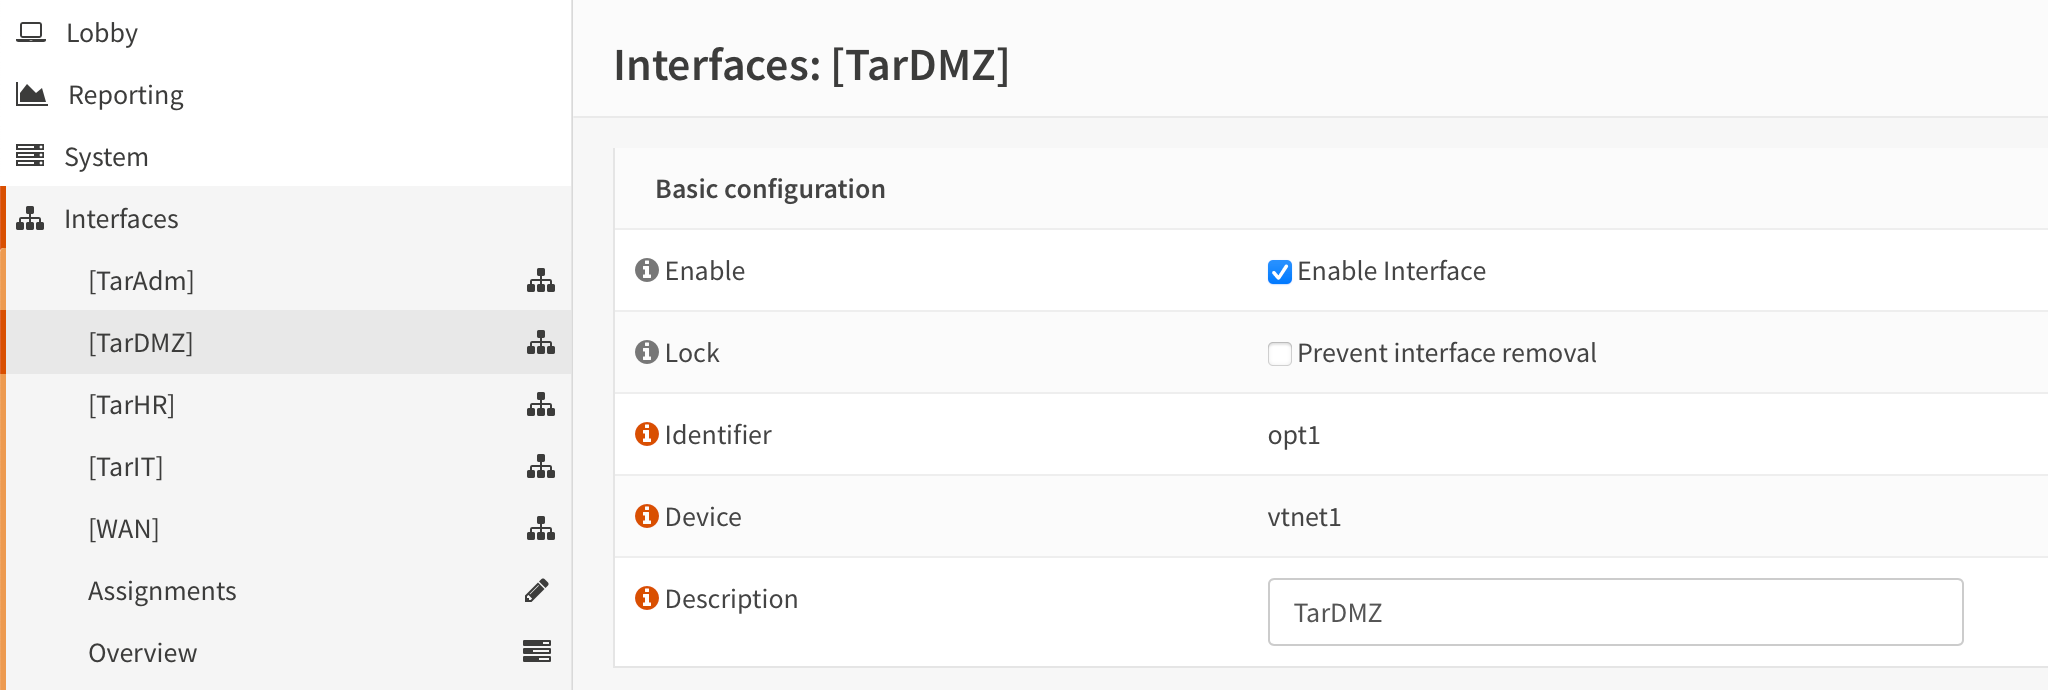
- For each interface set their static IPv4 to the gateway address of the respective VNet (e.g.:
TarDMZgets10.2.0.1)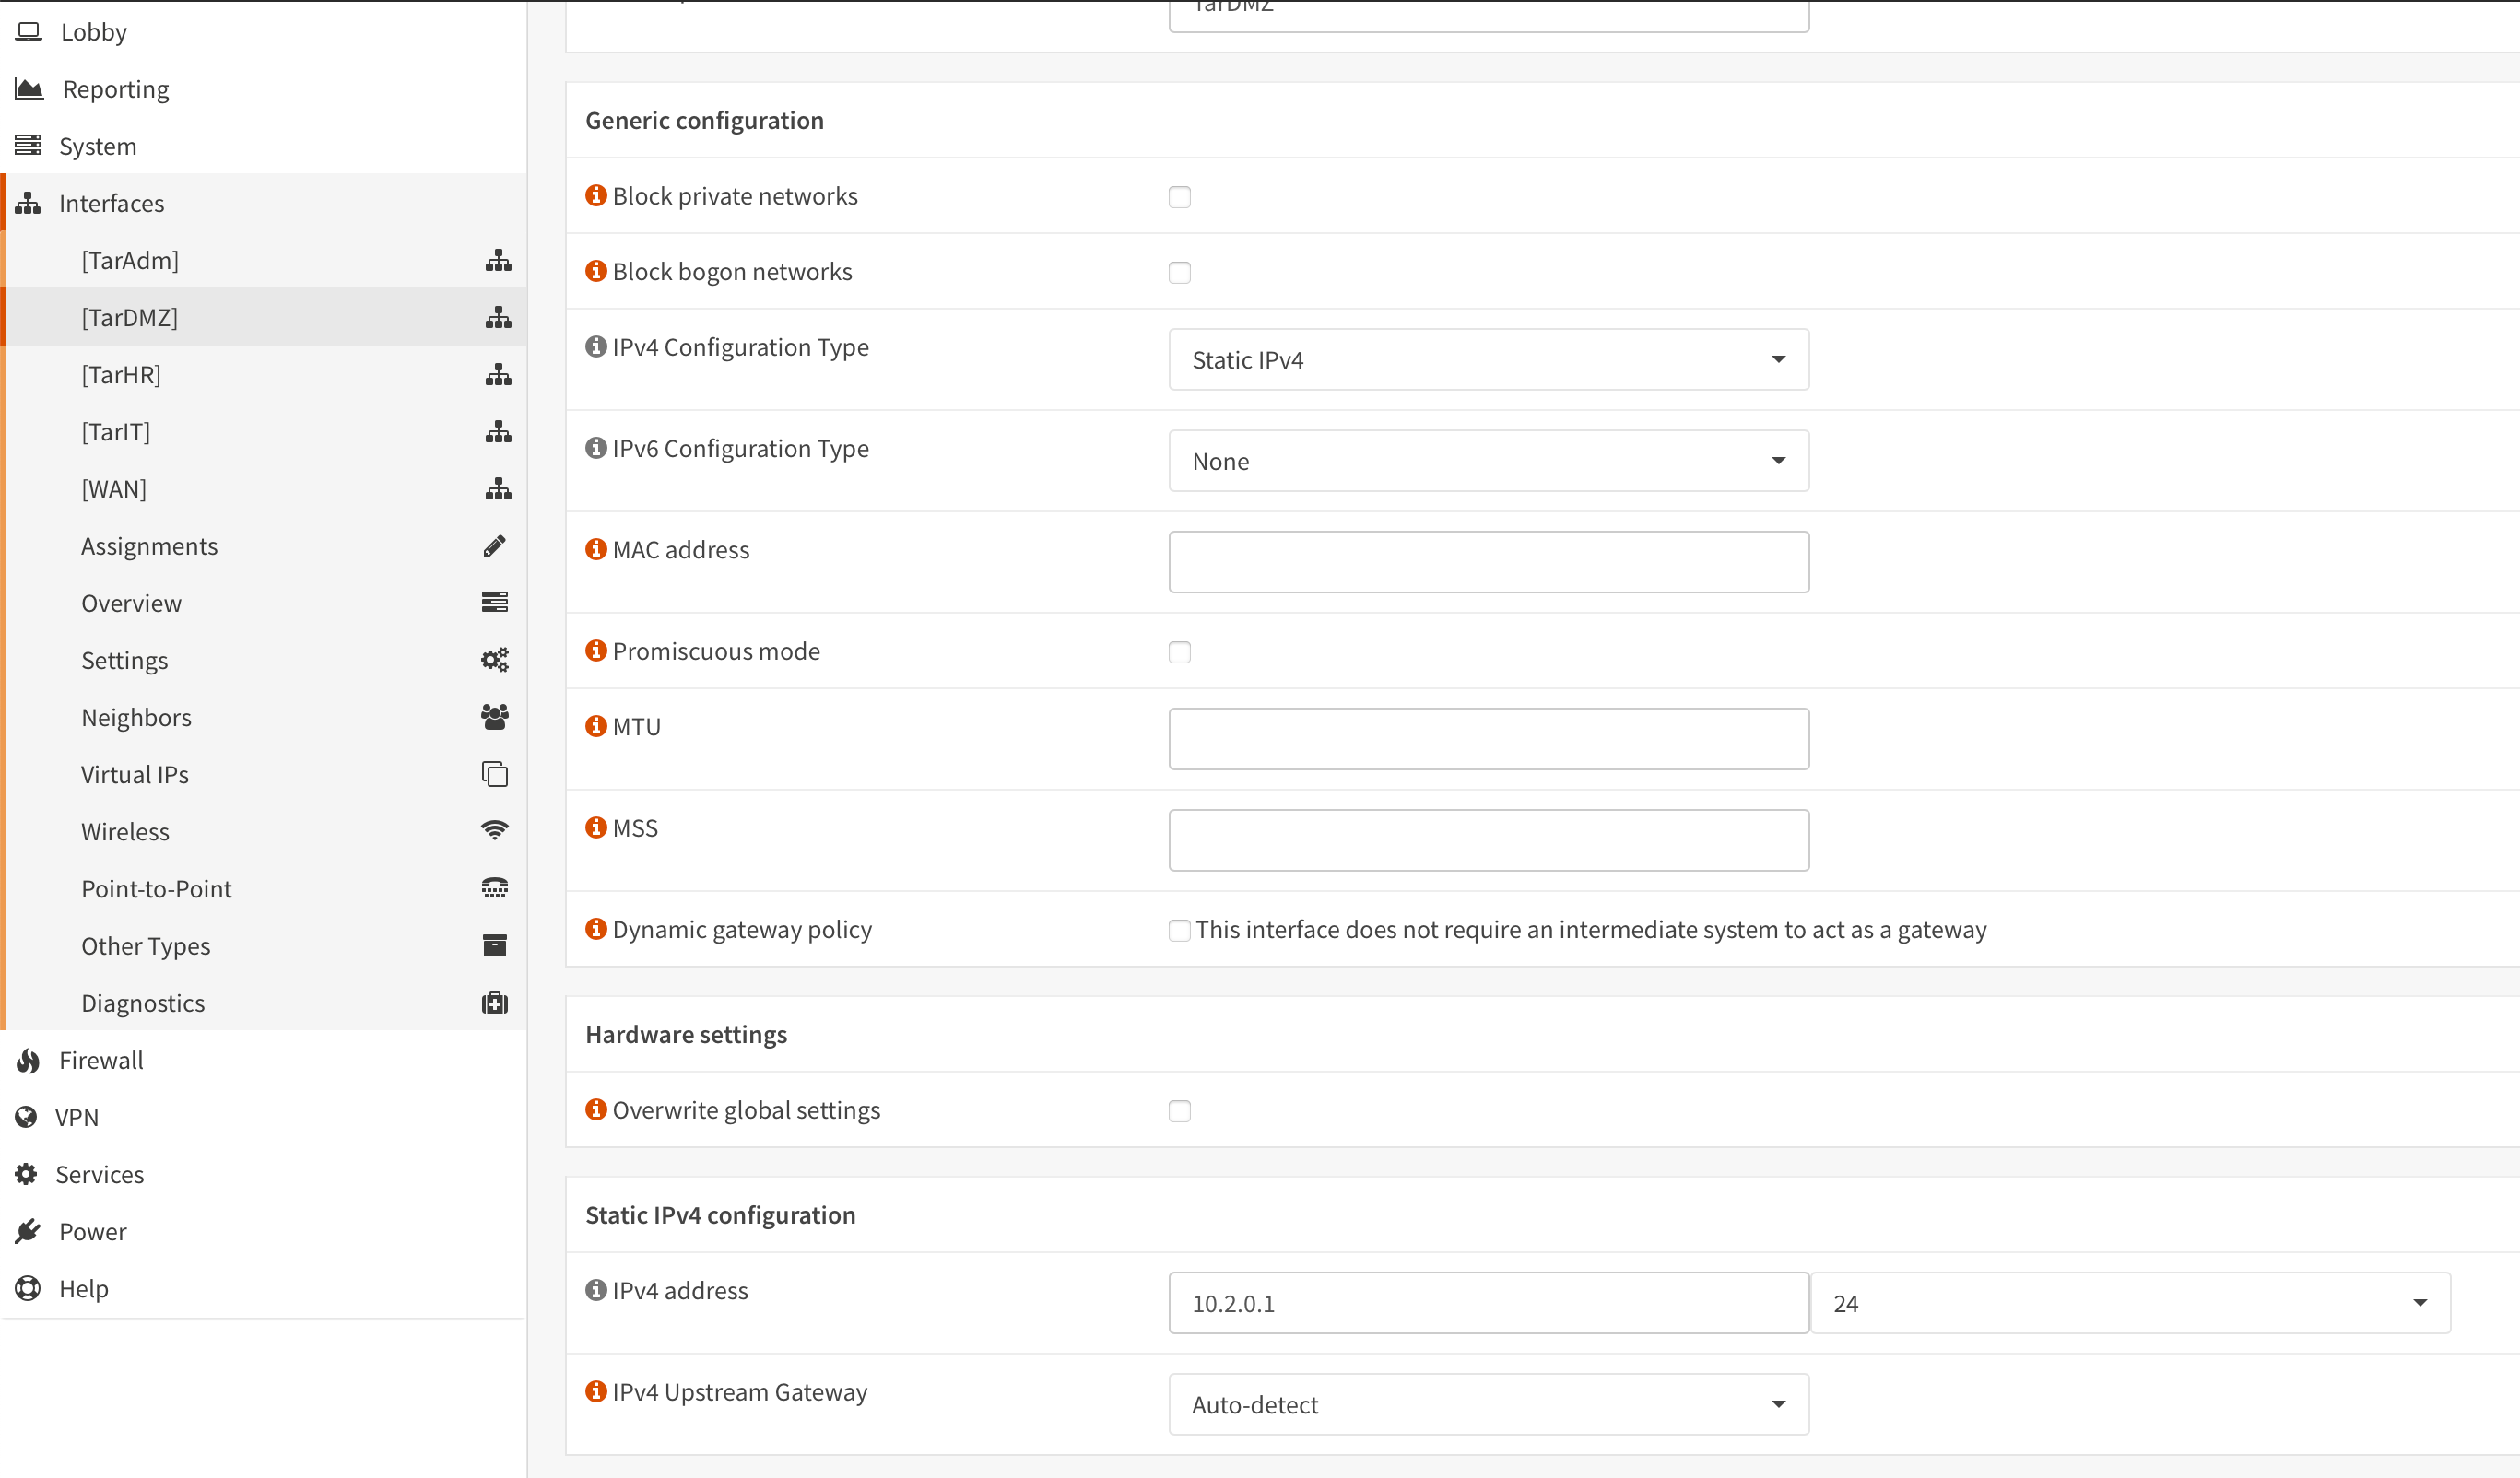
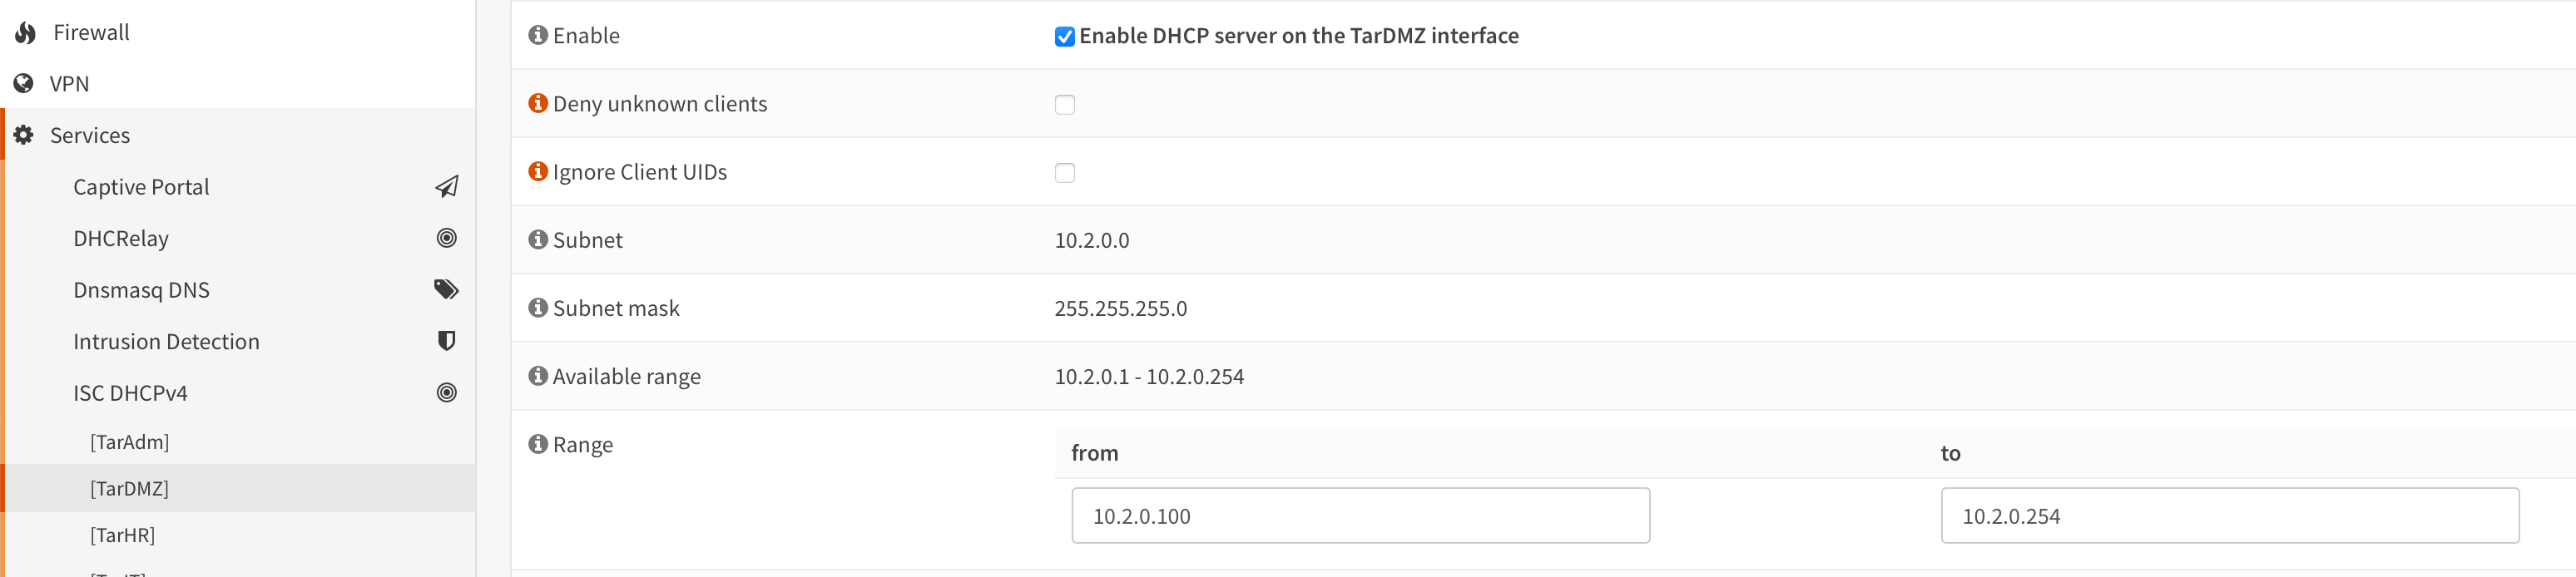
- Enable DHCP on each Interface and Configure the DHCP ranges as described in the table above
- Set DNS servers and uncheck
Allow DNS server list to be overridden by DHCP/PPP on WAN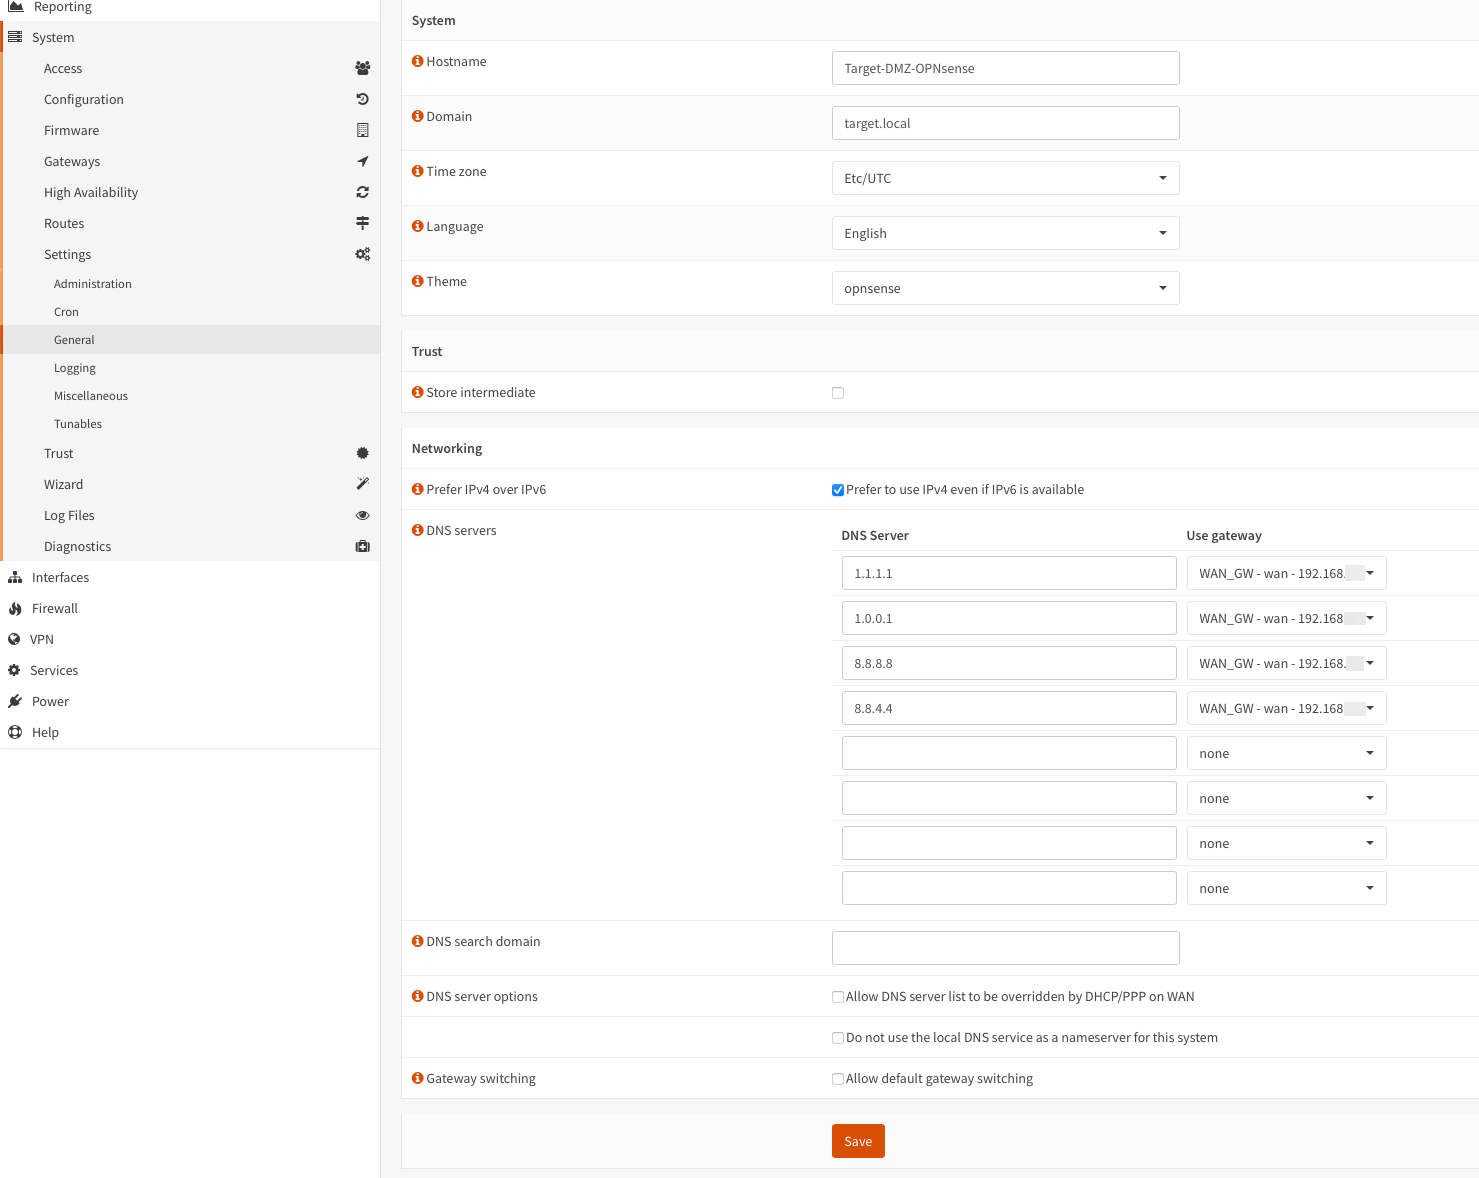 2
2
Rules
-
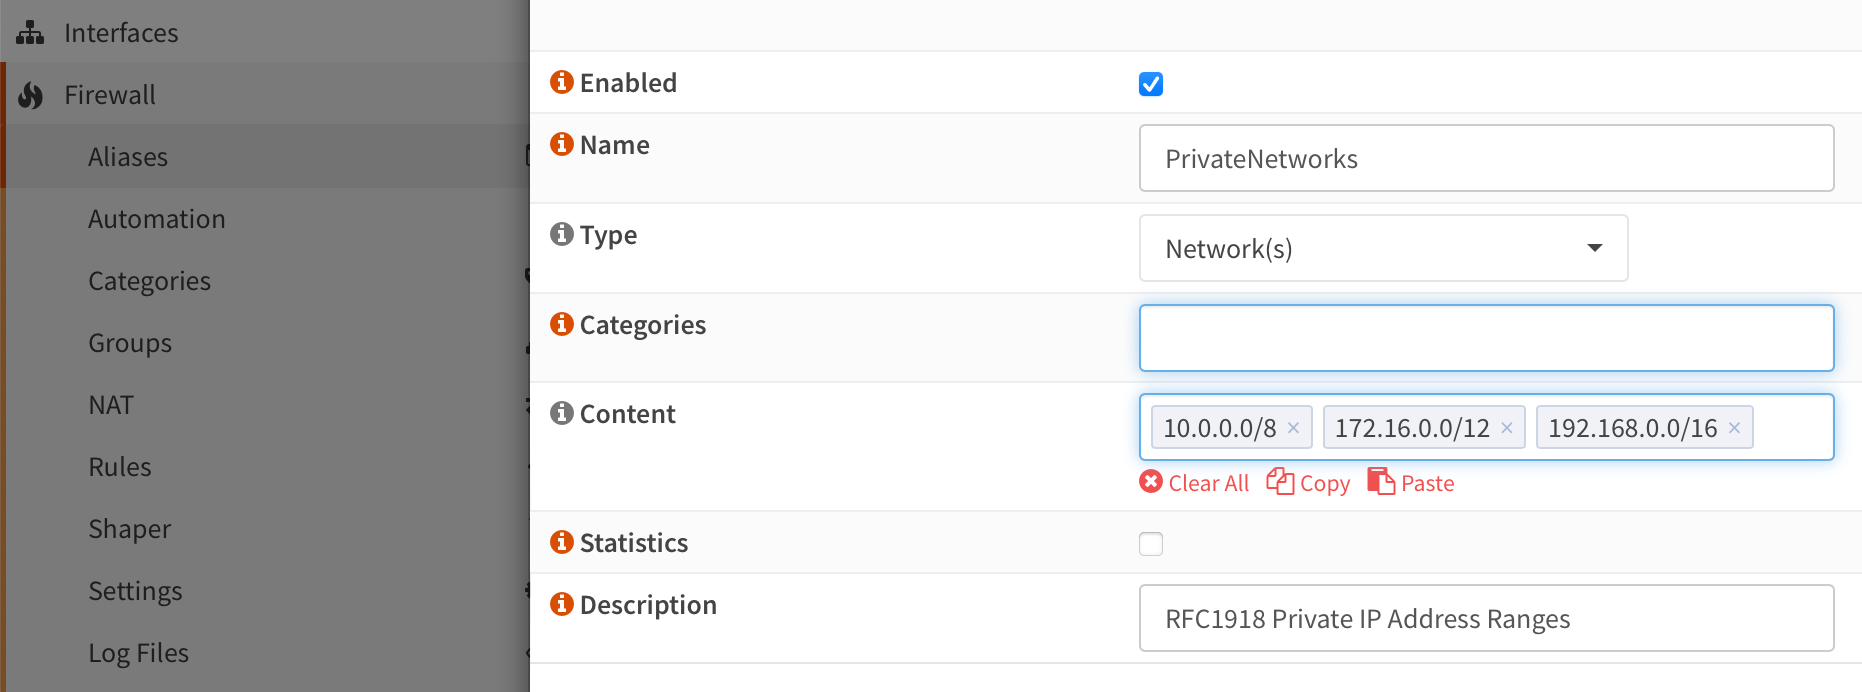
Add a new alias for private networks:
-
Create a new firewall rule to enable internet traffic and clone it to the interfaces
TarAdm,TarDMZ,TarHR&TarIT: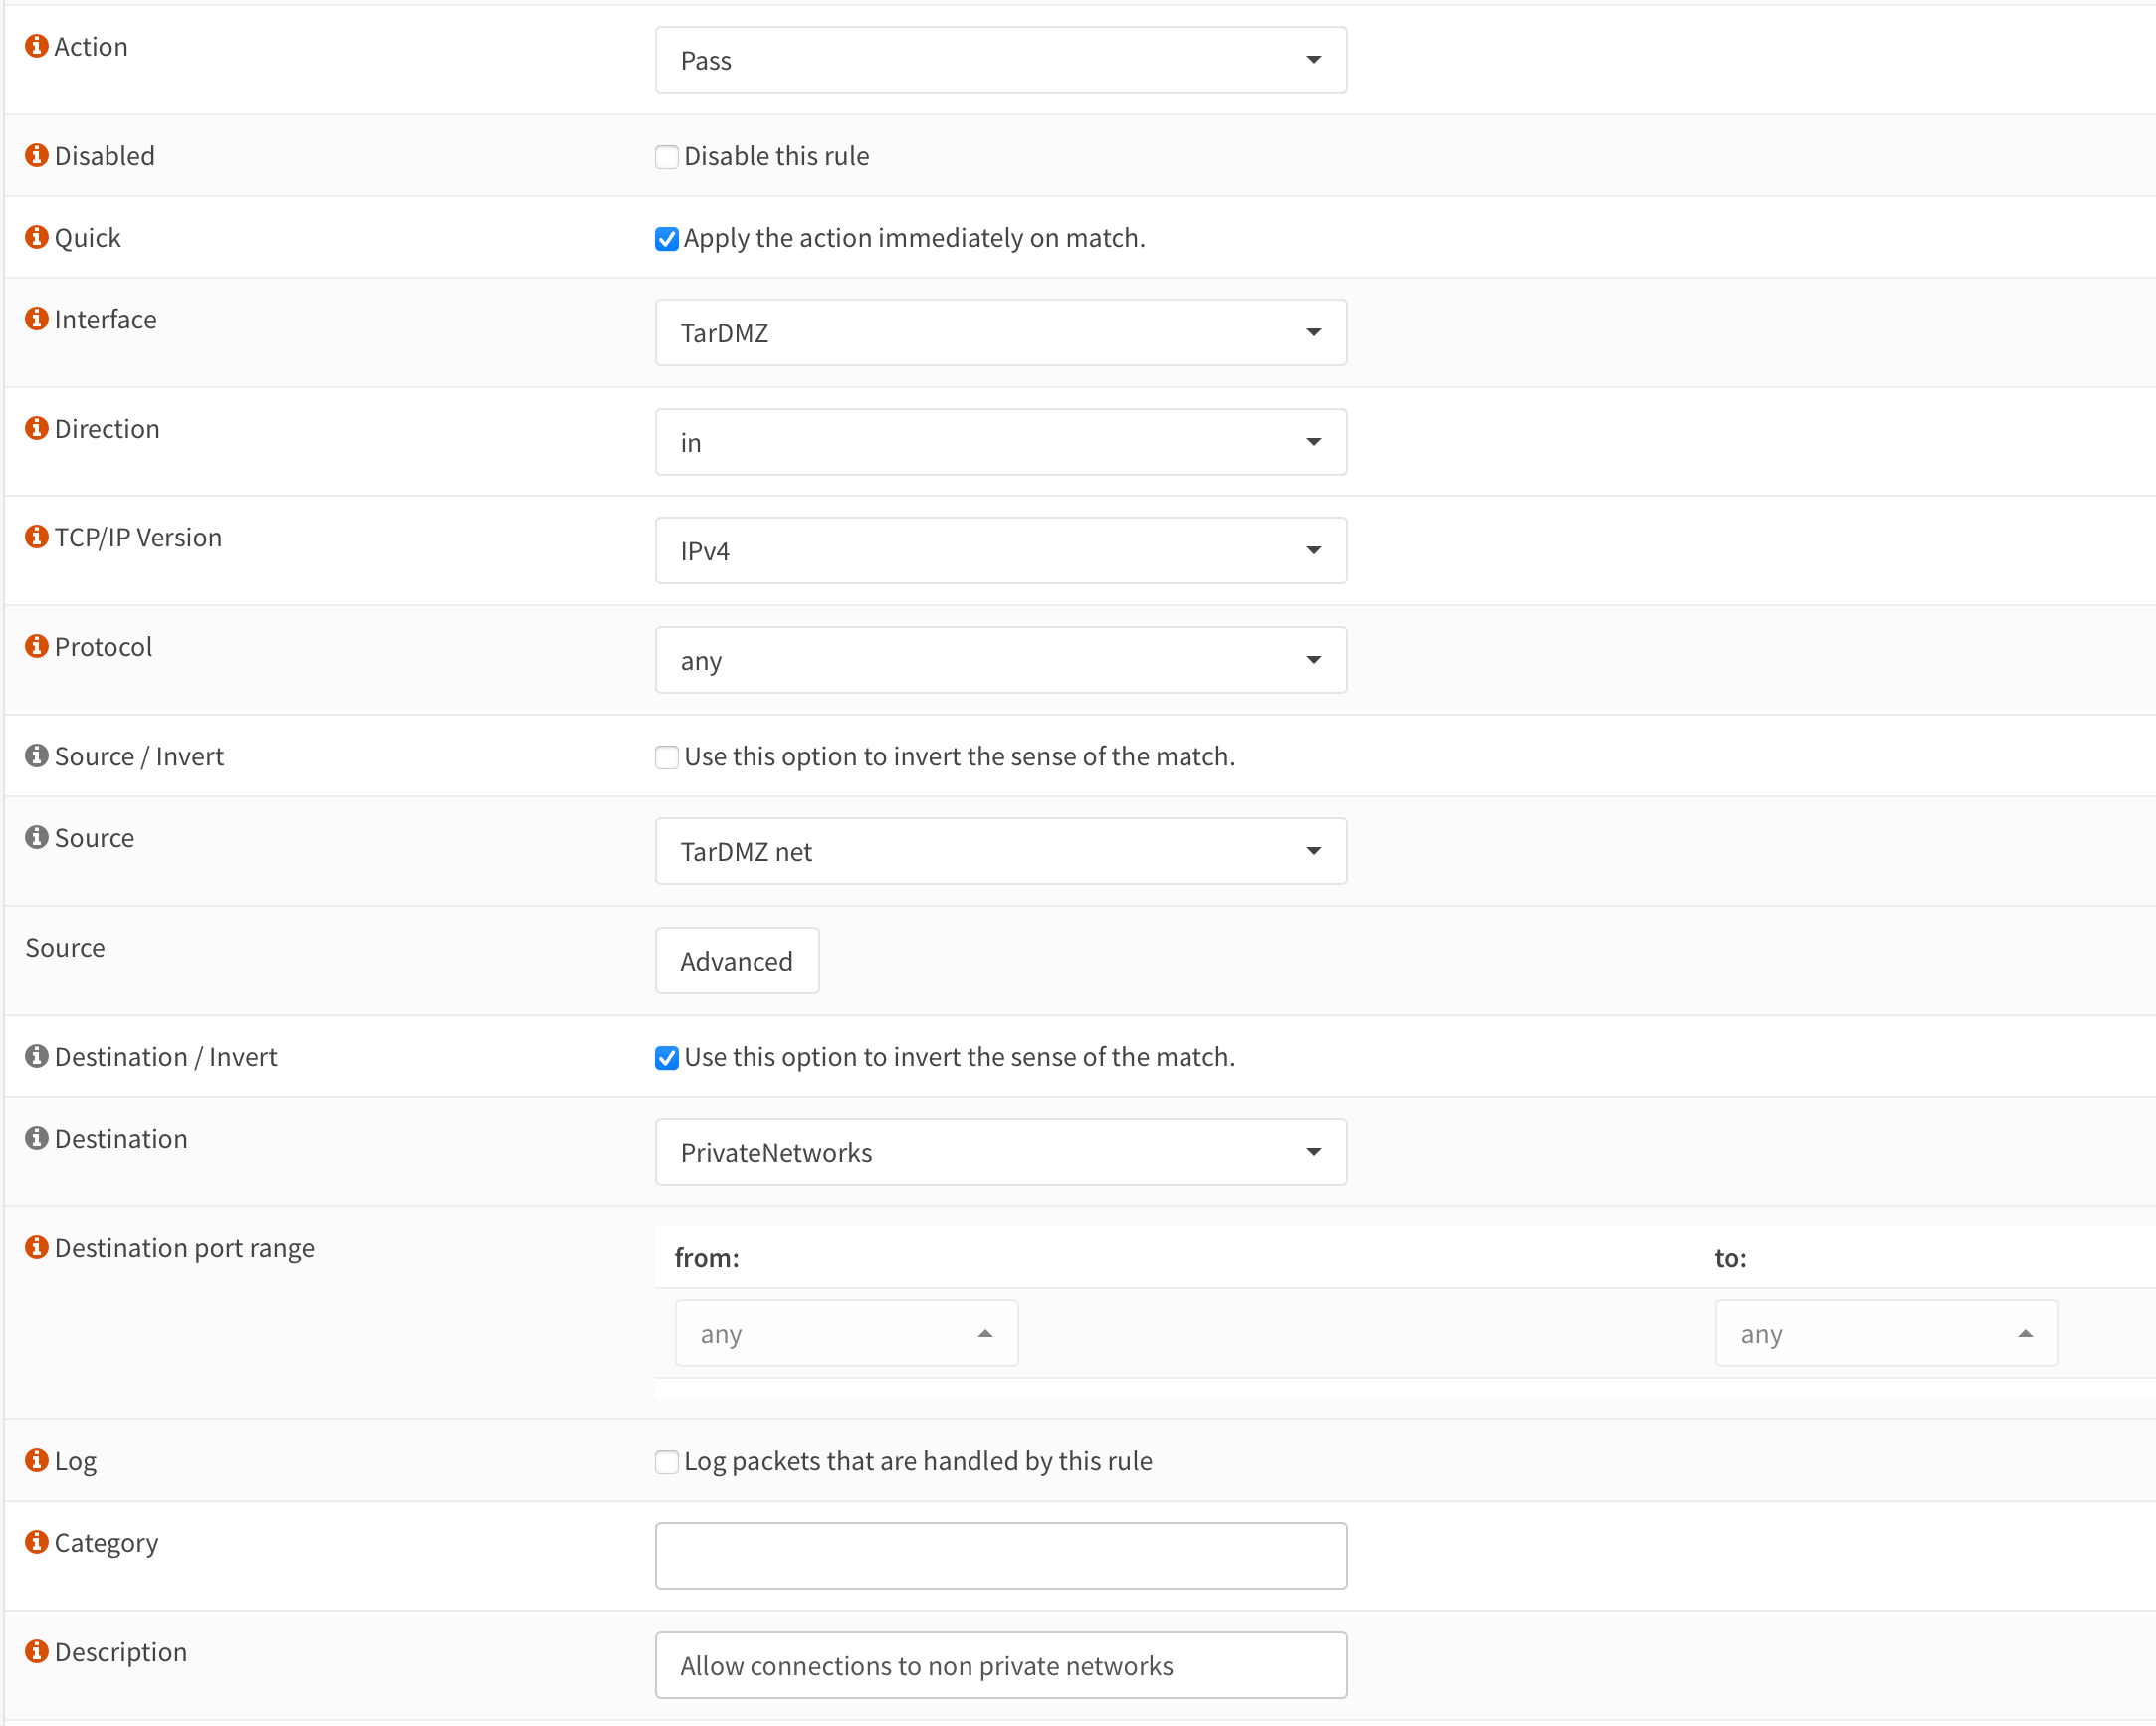
-
Create rules to allow traffic from the respective VNet into the VNets on each interface:
WARNING
Please note that these rules are very broad/loose!


Backup Your Config
This is optional, but I highly recommend you backup your config using Git, this gives you not only a backup of your Firewall incase you lock your self out, but also a change log of changes made!
OPNsense documentation: Traceability of configuration changes using Git
Relevant Note(s): Proxmox Hardening